AWS — S3
You'll create an S3 bucket, storage credential, and external location to connect Databricks to S3 in ~15 min.
Prereqs: Cloud Object Storage overview, AWS account with IAM and S3 permissions
What you'll build
An S3 bucket connected to Databricks through a Unity Catalog storage credential and external location. The QuickStart wizard handles IAM role creation via CloudFormation.
Prerequisites
- An AWS account with permissions to run CloudFormation templates and create IAM roles and policies.
- A Databricks workspace with metastore-admin or account-admin privileges.
Video walkthrough
Steps
1. Create an S3 bucket
This step is only required if no S3 bucket exists as a landing zone for your data. If your data already lives in an existing S3 bucket, skip to Step 2.
- Navigate to the AWS console.
- Search for S3 and select it.
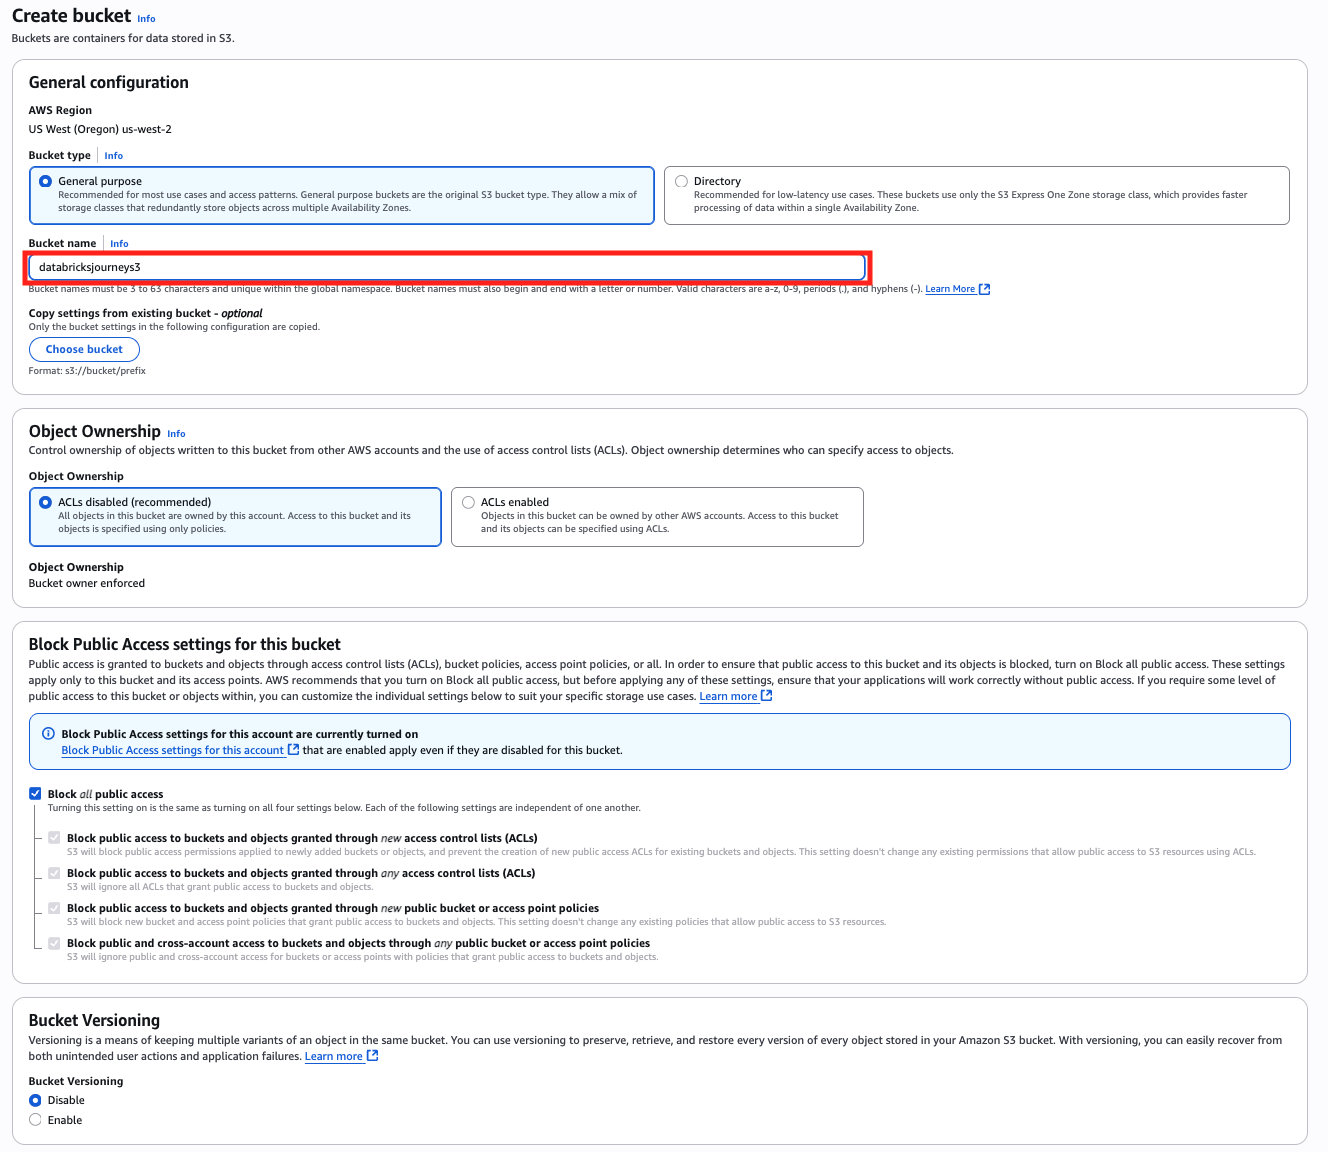
- Click Create bucket.

- Configure the bucket:
- Bucket name: a descriptive name for the bucket.
- Object ownership: ACLs disabled.
- Block public access: block all public access.
- Bucket versioning: disabled.
- Tags: optional but recommended.
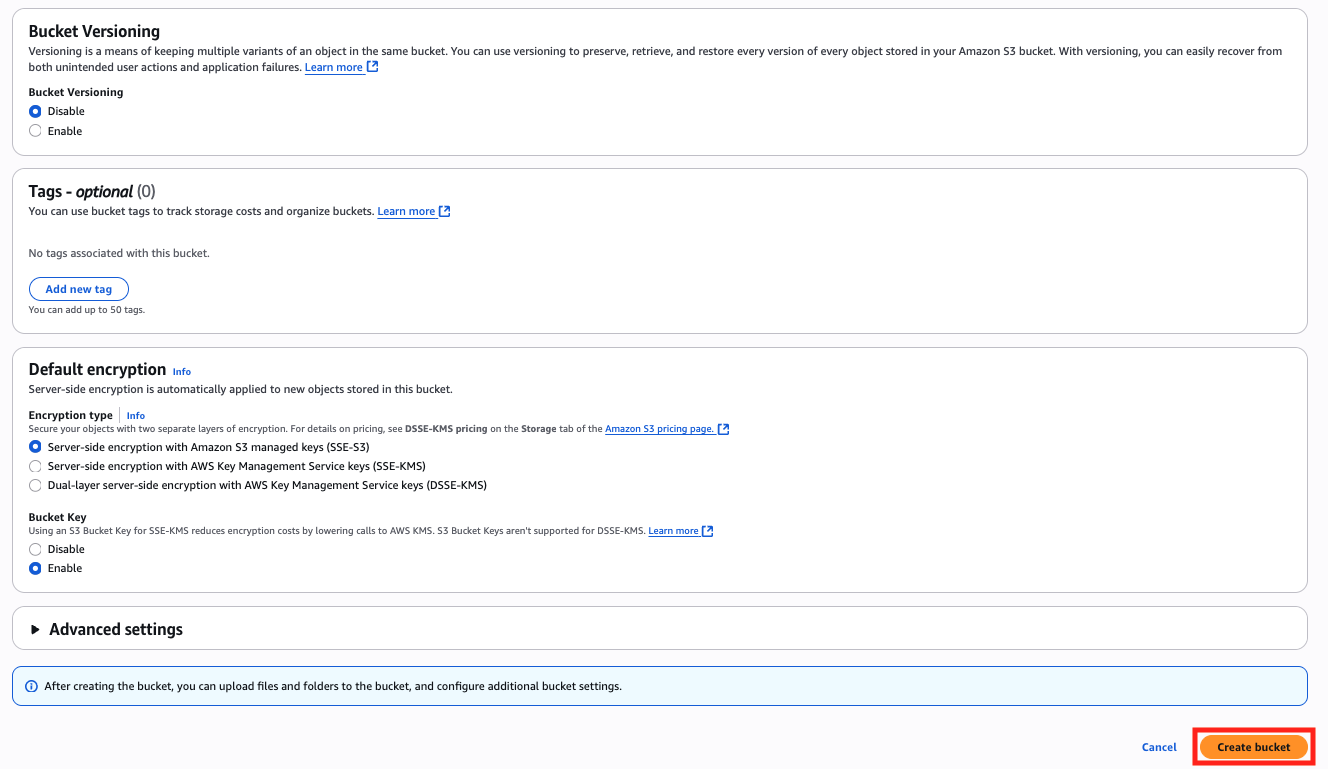
- Default encryption: SSE-S3 (server-side encryption with Amazon S3 managed keys).
- Bucket key: disabled.
2. Create an external location using the QuickStart
This is the process covered in the video walkthrough above.
- In the Databricks workspace, click Catalog in the left sidebar, then click External Data.

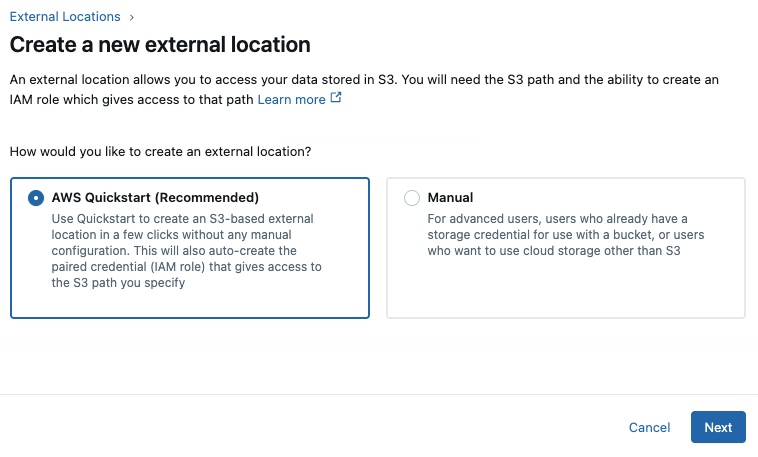
- Click Create external location.

- Select AWS QuickStart and click Next.
- Enter the bucket name (
s3://<existing-bucket-name>). - Click Generate new token and copy the token.

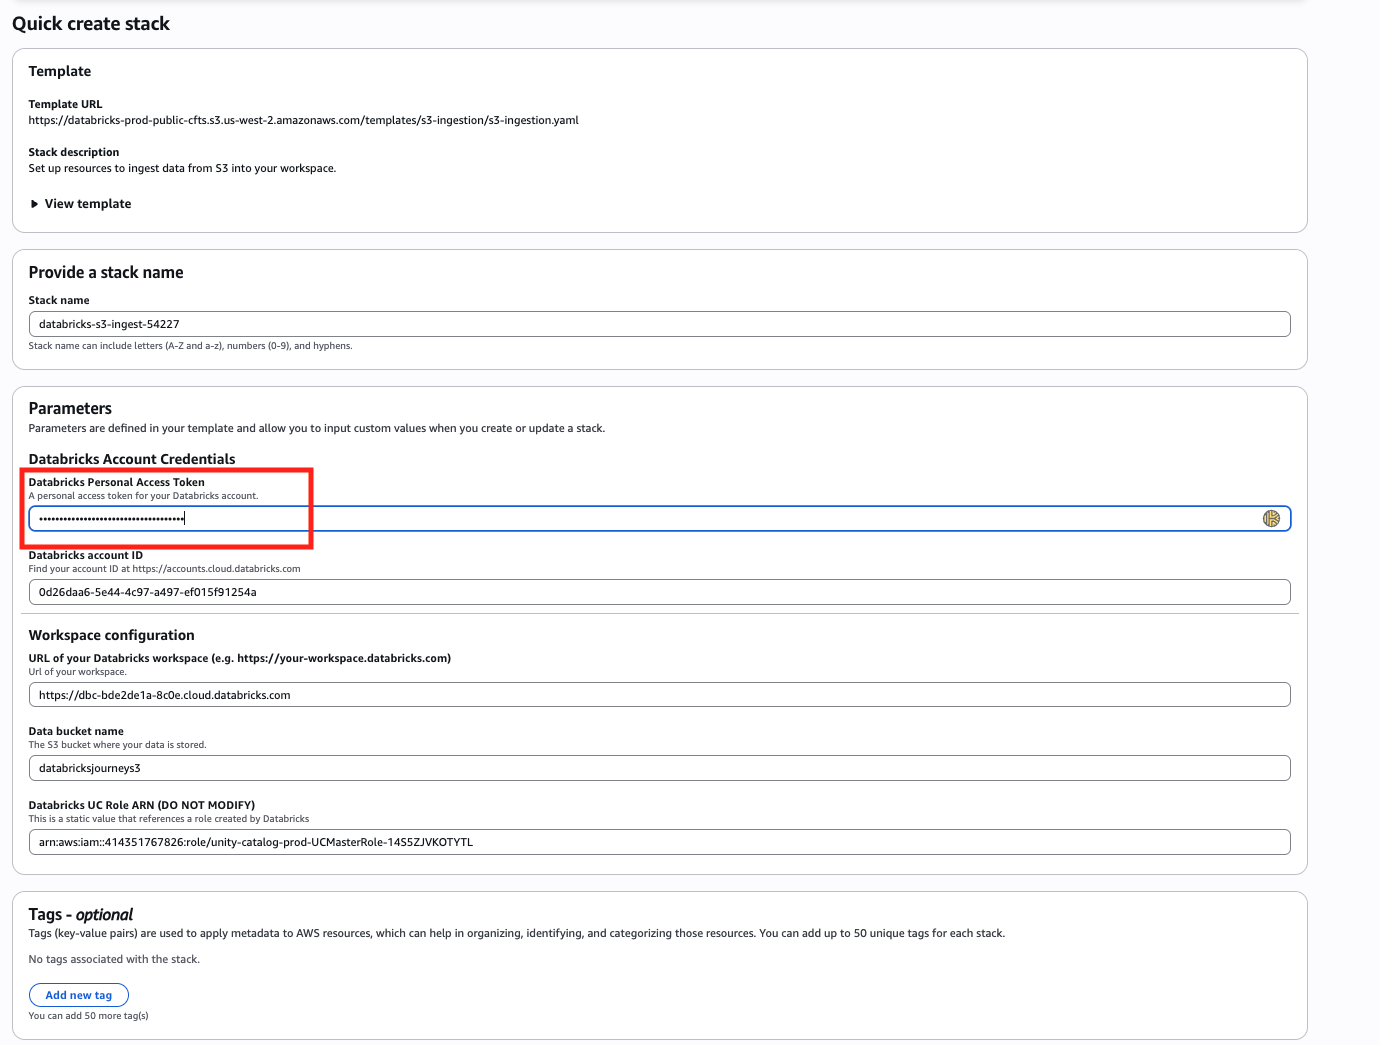
- In the CloudFormation page, paste the token in the Databricks Personal Access Token field.
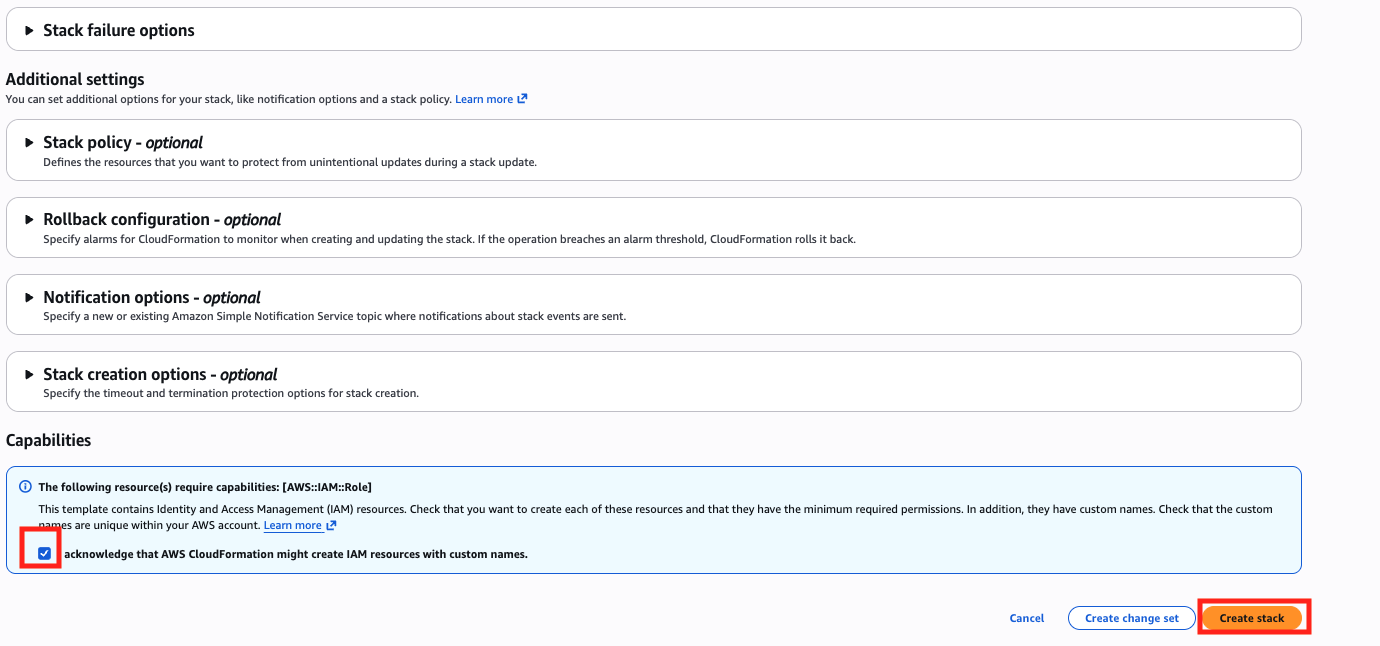
- Check I acknowledge that AWS CloudFormation might create IAM resources with custom names.
- Click Create stack.
3. Mark the external location as read-only
After the external location is created, mark it as read-only. This prevents any Databricks workload from writing to the storage path, protecting your source data from accidental modifications.
Follow the guide: Mark an external location as read-only.
Skipping this step leaves the external location writable by any principal with write grants. Always set it to read-only unless your pipeline explicitly needs to write back to this path.
Verify
- In the Databricks workspace, navigate to Catalog > External Data > External Locations.
- Click the new external location and click Test Connection.
- Confirm the test returns a success status.
Troubleshoot
CloudFormation stack fails to create
Check the CloudFormation Events tab for the specific error. Common causes: the IAM user running the template lacks permission to create roles, or the S3 bucket name is misspelled in the QuickStart form.
External location test fails after creation
The CloudFormation stack creates an IAM role with a trust policy scoped to the Databricks account. Verify the stack completed successfully in the AWS console and that the role ARN matches what Databricks expects.
Next
- Do next: Managed connectors
- Learn why: Unity Catalog foundations
- Reference: Create a storage credential and external location for S3