Use the app
Run the customer journey
The App separates evidence collection from human judgement. Automated evidence produces an indicative result; review completes the selected scope; publication creates the immutable report used for governance and comparison.
1. Prepare the assessment
Open Assess → Prepare assessment. Work through the six setup steps:
- Name the assessment, state why it exists and name its owners.
- Choose every visible workspace or a specific workspace selection, then set the historical lookback.
- Choose all seven pillars or the subset relevant to this review.
- Review where automated and human evidence will come from.
- Optionally record target posture and target date by pillar.
- Confirm the summary.
Use a saved definition for recurring governance. Use a custom run only for a deliberate one-off question.
2. Collect automated evidence
Select Run assessment in the header. The scope dialog starts with the current saved definition and lets you narrow pillars or choose a custom workspace scope. Check the summary at the bottom before selecting Start assessment.
Collection reads only what the scanning identity is allowed to read. A missing grant, absent system table or unreadable API becomes a visible measurement gap attached to the affected requirements.
Only one scan runs at a time. You may move around the App while it runs; the header preserves progress and routes you into review when collection completes.
3. Read the indicative result
The Dashboard remains the permanent state-of-the-estate entry point. After automated collection it shows:
- indicative posture for every pillar with automated evidence;
- the score range and confidence that follow from coverage;
- assessed, unmet and unanswered counts;
- the first actionable recommendation; and
- material movement from the previous comparable run.
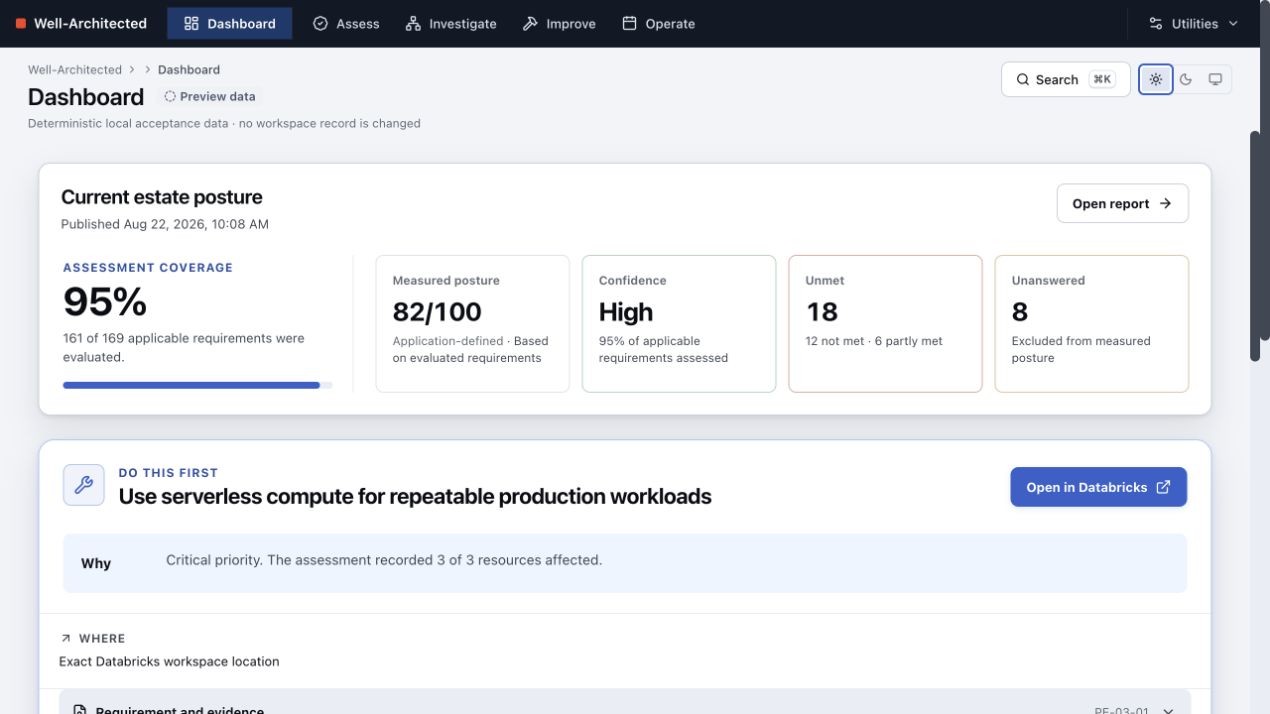
An unanswered or unmeasured requirement is excluded from posture; it is not treated as passing. A pillar with too little evidence is shown as not assessed rather than receiving a misleading confident score.
4. Supply human evidence and review pillars
Open Assess → Review. Each selected pillar separates:
- Measured by this run — automated outcomes and their evidence;
- Needs an answer — practices only an accountable person can confirm; and
- Measurement gaps — evidence the App attempted but could not obtain.
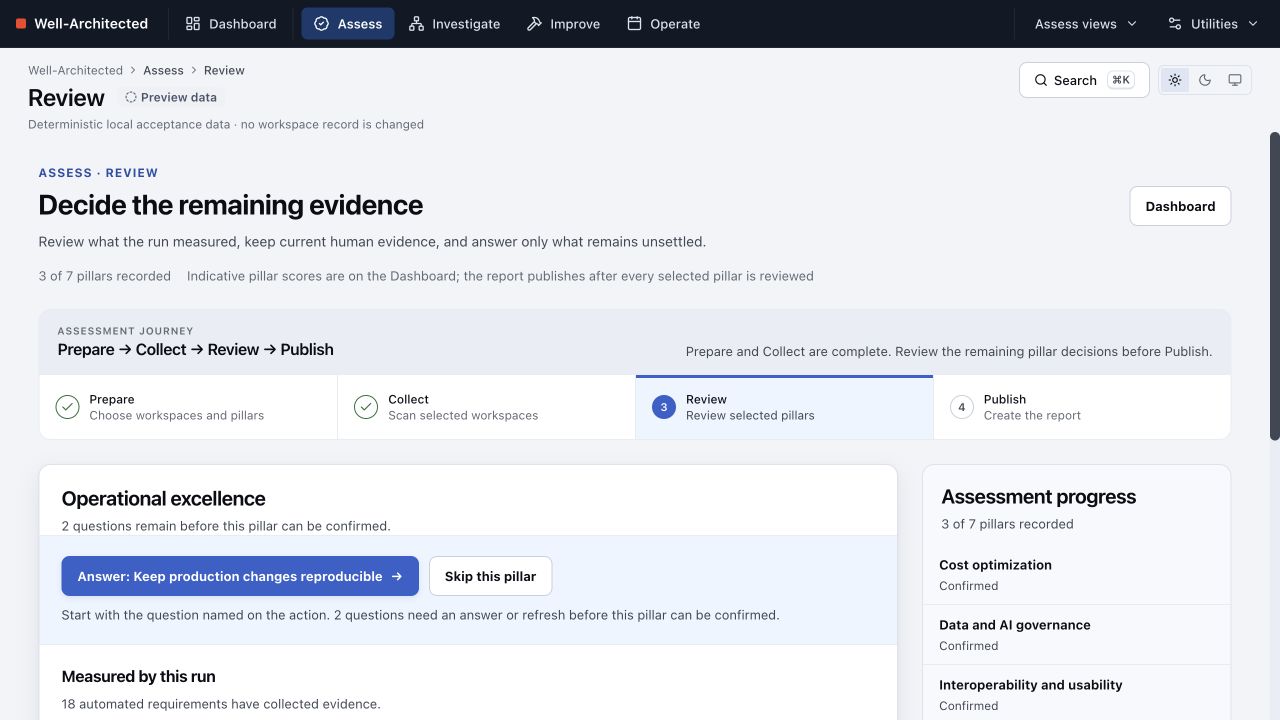
Select the named answer action, record the outcome, provide the evidence or rationale requested, identify the accountable owner and set the next review date. The record button enables only when the required fields are complete; this prevents an outcome with no support from entering the report.
When every requirement needed by a pillar is settled, choose one of two explicit decisions:
- Confirm pillar — include the current automated and human evidence in the final result.
- Skip pillar — record that the pillar was deliberately excluded from publication.
Skipping is not passing. The report preserves the decision and its coverage consequence.
5. Publish the report
After every selected pillar has a decision, publish the review. Publication freezes one final result against the run, assessment definition fingerprint, methodology version, evidence and reviewer decisions.
The report includes an executive summary, scope and confidence, posture by pillar, material risks, measurement gaps, improvement progress and every requirement considered. Use Print for a customer-ready PDF or the header Export control for machine-readable records.
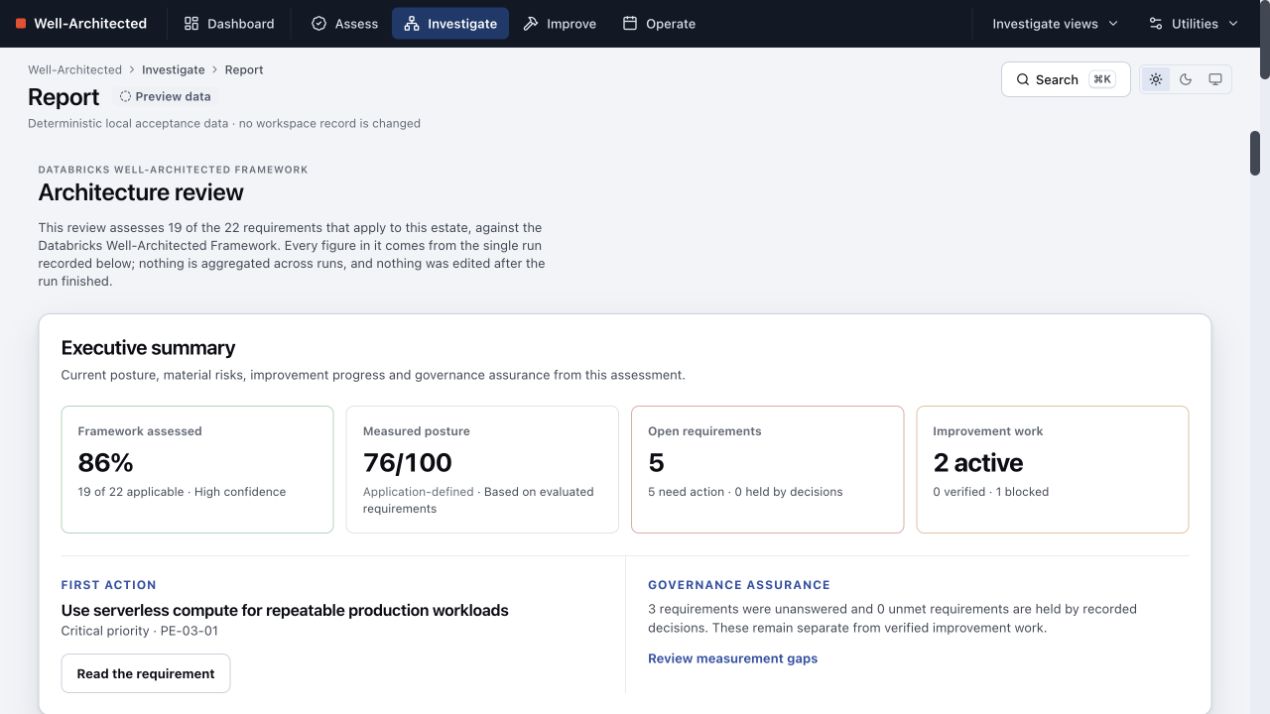
Publication does not delete or overwrite the indicative result. It establishes the reviewed result that the Dashboard and later comparisons use.
6. Investigate an unmet requirement
Open a recommendation from the Dashboard, a pillar or Findings. Investigation is requirement-led:
- Select an unmet or partly met requirement.
- Read Do this, Why, Where, Owner and Verify.
- Inspect the observed and expected evidence and its confidence limits.
- Use the affected-resource list and exact Databricks deep links when the evidence names resources.
- Open the full Estate only when architecture relationships help answer the selected requirement.
- Write an append-only note for context that should remain with the requirement.
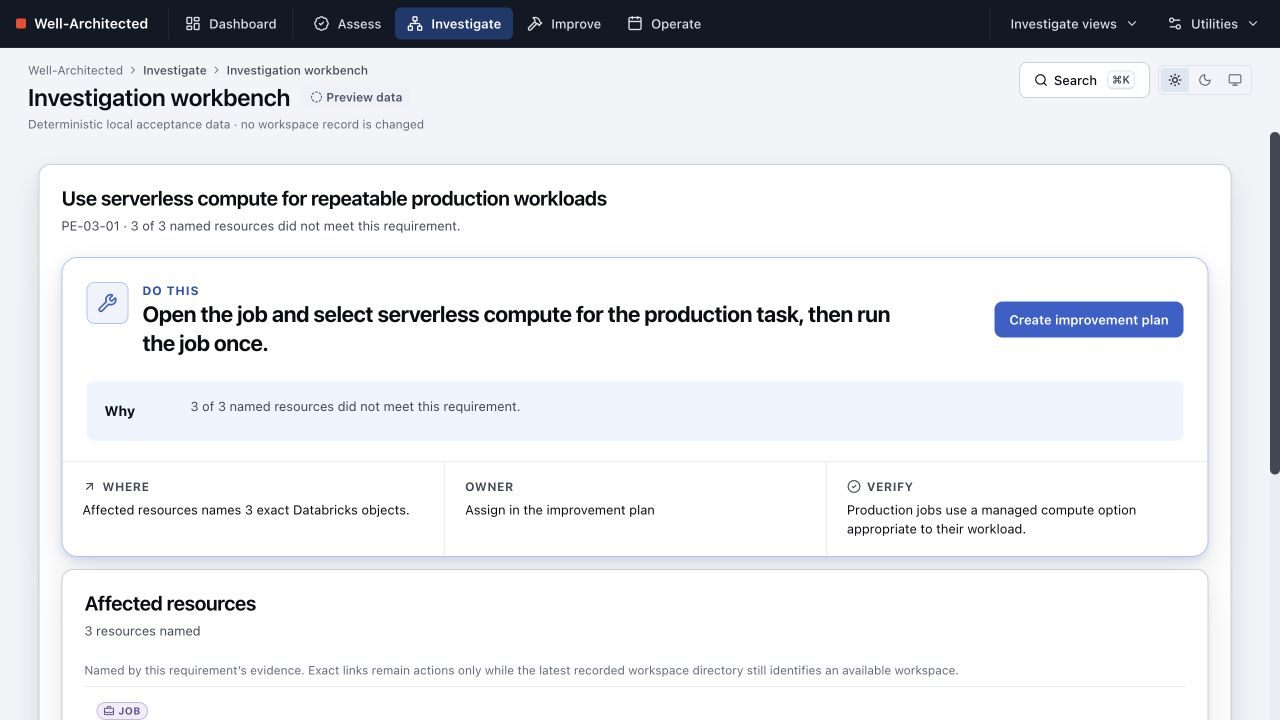
Scope-wide controls deliberately do not fill the canvas with unrelated resources. Their inspector explains the policy or share being measured and gives the closure plan instead.
7. Create and run an improvement plan
From Investigation, choose Create improvement plan. A plan groups work around an outcome; actions carry the executable commitments.
For every action, record:
- a concise outcome;
- owner and due date;
- requirements it covers;
- implementation steps; and
- the condition a later assessment must observe to verify closure.
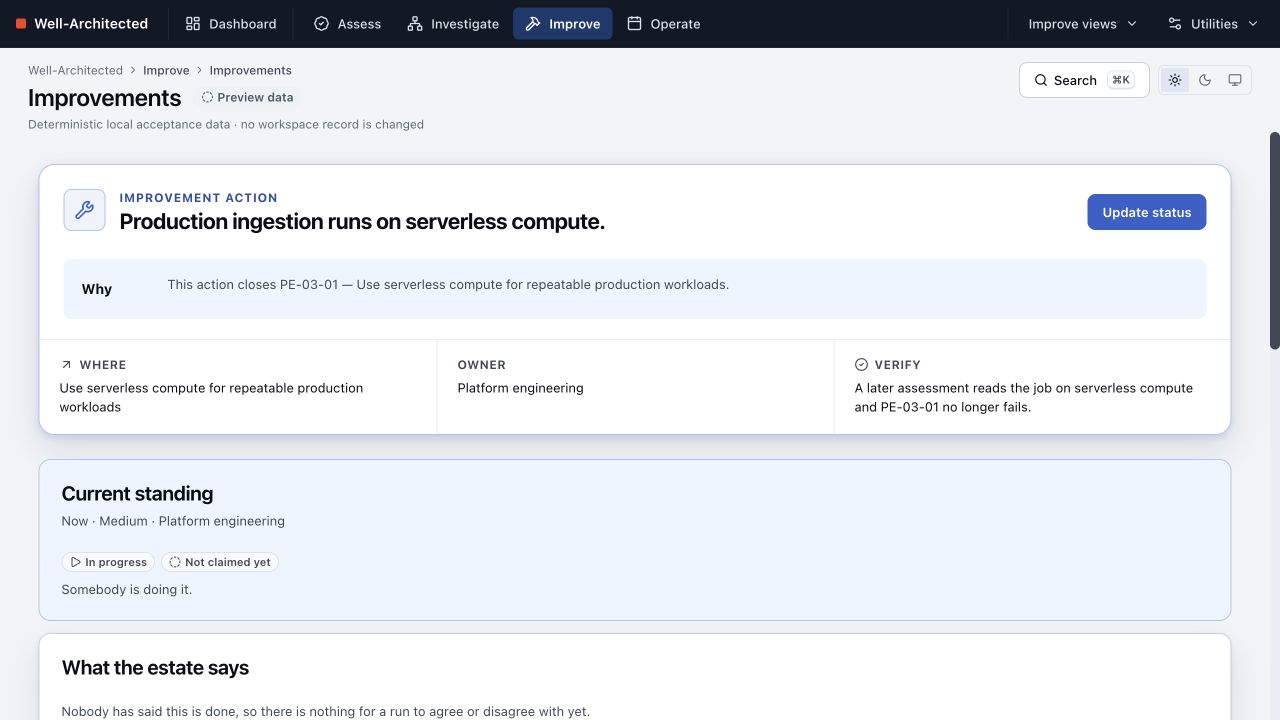
Move work through draft, planned, in progress, blocked, done or cancelled using Update status. Marking an action done does not change a requirement's outcome. A later assessment verifies it; if the requirement is still unmet, the action is shown as contradicted.
Use Send this plan to share the plan record and Close the plan only when no further active action belongs in it.
8. Record decisions and exceptions
- Decisions records accepted or deferred risk against a requirement. It explains the ownership and reasoning; it does not alter the measured outcome.
- Exceptions records a time-bounded accepted exception and its expiry. Expired or soon-expiring exceptions return to Next actions.
- Notes preserve context without pretending to be a decision or changing score.
These records remain separate from verified improvement work so a report can distinguish “fixed,” “accepted” and “not yet addressed.”
9. Operate the cycle
Open Operate → Next actions for the recurring queue. It prioritises open reviews, contradicted actions, overdue work, expiring exceptions and partial scheduled runs, while keeping settled history out of the way.
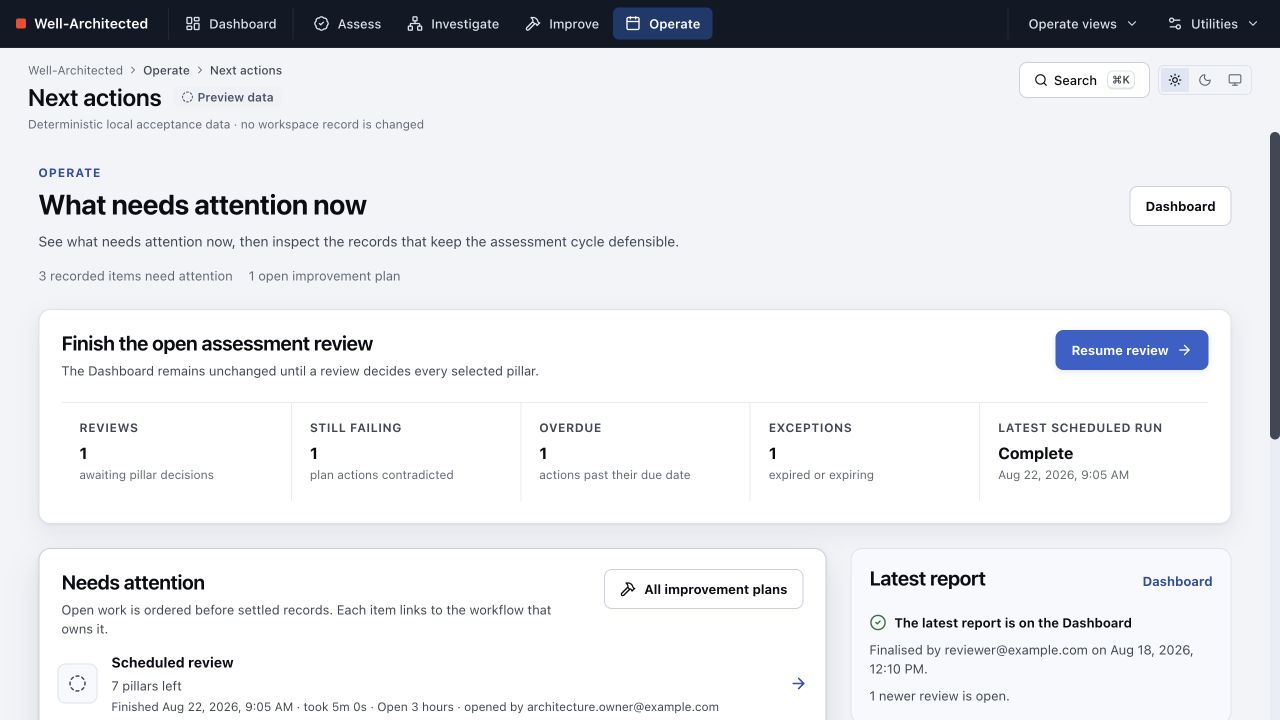
Use Runs for exact collection history, Months for closed reporting periods, Retention for lifecycle policy, Audit trail for who did what, and Diagnostics for dependency health.
Read scores correctly
- Posture is calculated only from evaluated, applicable requirements.
- Coverage says how much of the applicable framework was evaluated.
- Confidence follows from coverage and evidence quality.
- Human answers are labelled as stated, not read.
- Cross-run movement is shown only where scope and methodology are comparable.
- Improvement actions and risk decisions never silently change the score.